> Chapter 2 - Building C# Applications
AUTHOR: PID-1
TIMESTAMP: 2026-06-01 15:08:49
Installing .NET 6
To get started developing applications with C# 10 and .NET 6 (on Windows, MacOS, Linux), the .NET 6 SDK needs to be installed (which also installs the .NET 6 runtime). https://dotnet.microsoft.com/en-us/download/dotnet/6.0Understanding the .NET Version Numbering Scheme
For ex: .NET 6 SDK is at version 6.0.100: • The first two numbers (6.0) indicate highest version of the runtime you can target. In this case, that's 6.0. This means the SDK also supports developing for a lower version of the runtime, such as .NET 5 or .NET Core 3.1 • The next number (1) is the quarterly feature band. Since we are currently in the first quarter of the year since the release, it is a 1. • The final two numbers (00) indicate the patch version. This is a little bit clearer if you add a separator into the version in your ming and think of the current version as "6.0.1.00".Confirming the .NET 6 Install
.NET Command-line interface (CLI) -> dotnet.exe 1. dotnet.exe --version :Display .NET SDK version in use or the version specified in a "global.json". 2. dotnet.exe --list-runtimes : Display the installed runtimes. There are 3 different runtimes: a. Microsoft.AspNetCore.App : For building ASP.NET Core Applications b. Microsoft.NETCore.App : The foundational runtime for .NET c. Microsoft.WindowsDesktop.App : For building WinForms and WPF applications. 3. dotnet.exe --list-sdks : Display the installed SDKs.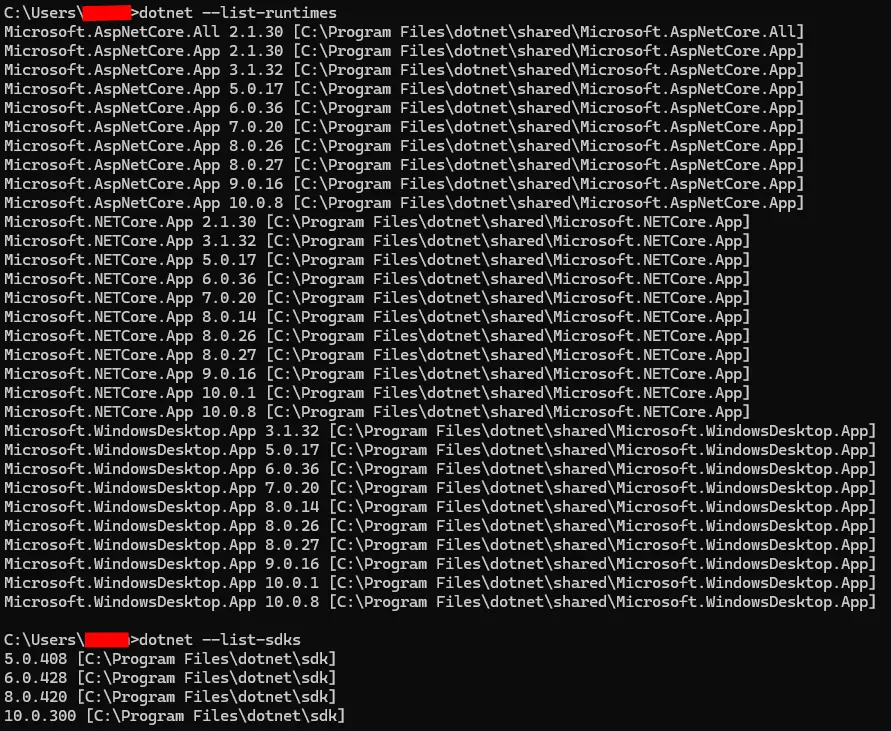
Checking for Updates
"dotnet.exe sdk check" : This command will not update any of the versions for you, it just reports the status. To update download and install new versions.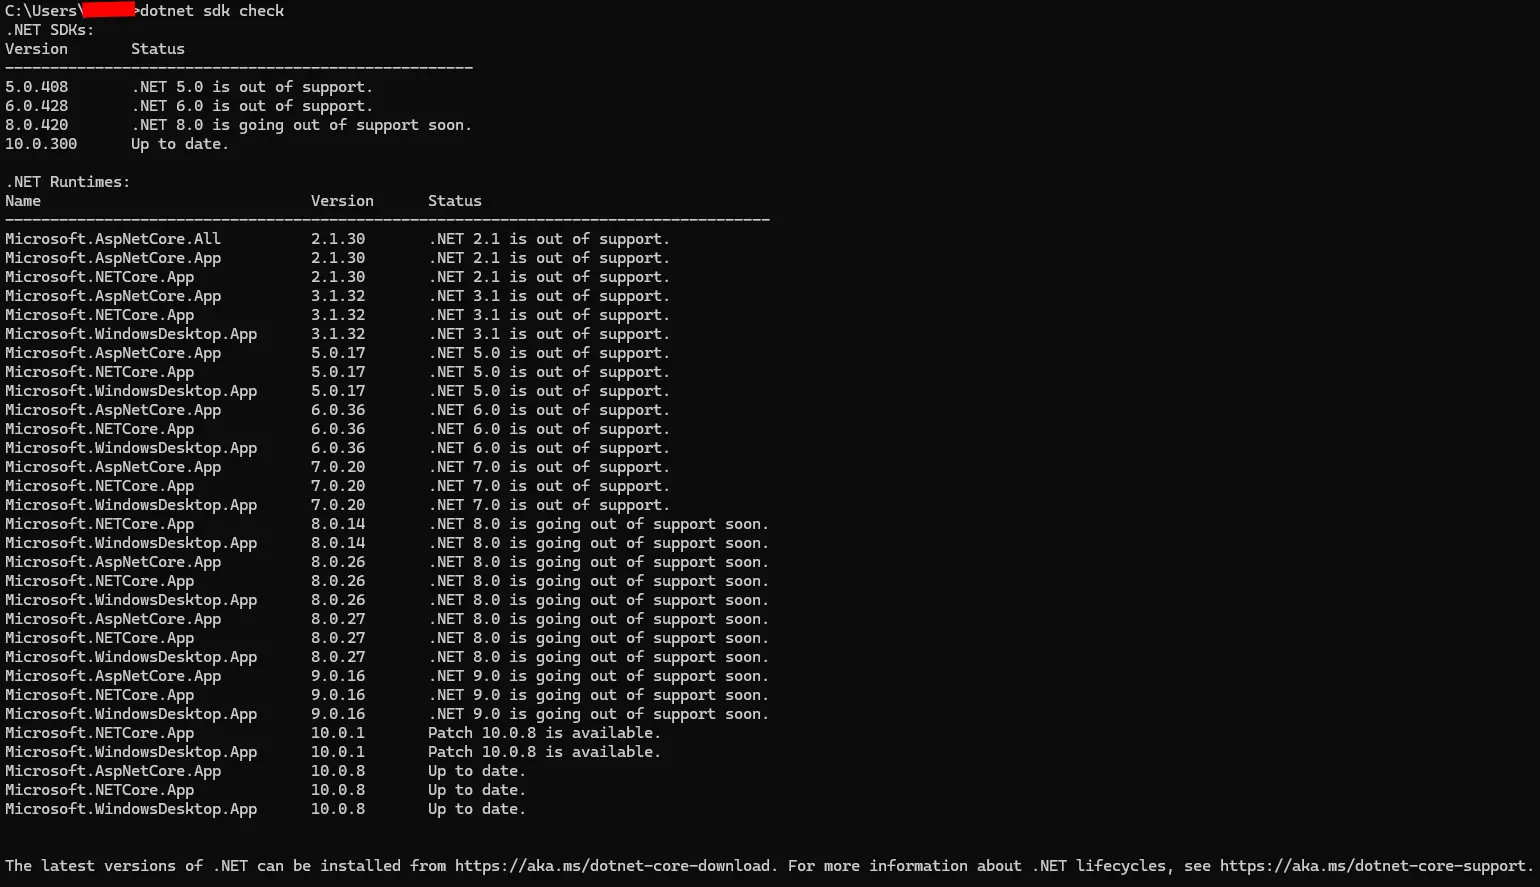
Use an Earlier Version of the .NET Core SDK
If you need to pin your project to an earlier version of the .NET SDK, you can do that with a "global.json" file. To create this file: "dotnet.exe new globaljson --sdk-version 5.0.400" Check: "dotnet.exe --version"Changing the Target .NET Core Framework
1. Double-click the project name in Solution Explorer. Or By right-clicking the project name in Solution Explorer -> Edit Project File: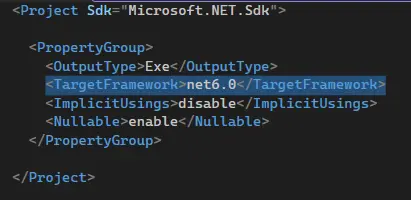 2. Click Project -> Right click and open Properties and select the Target Framework.
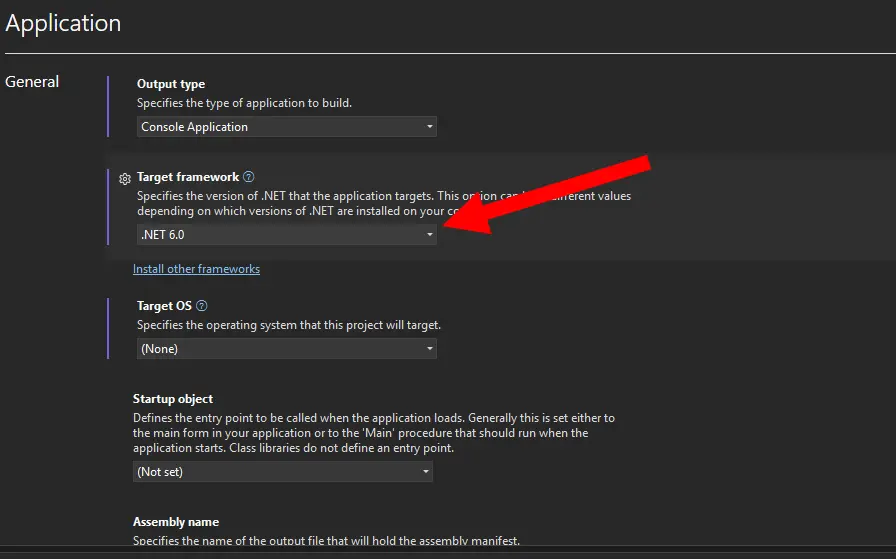 Note : When we debug the project or run the project then the console automatically does not close itself. If you want to chenge the VS Debuggine experince to automatically end the program, select Tools -> Options -> Debugging -> Automatically close the console when debugging stops.
Running and Debugging Your Project
CTRL+F5 (run without debugging). When you "run" your program with CTRL+F5, you bypass the integrated debugger. If you need to debug your code, your first step is to set breakpoints at the code statement you want to examine. Then, you can press F5 key (start debugging), your program will halt at each breakpoint.Using the Visual Class Diagram Tool
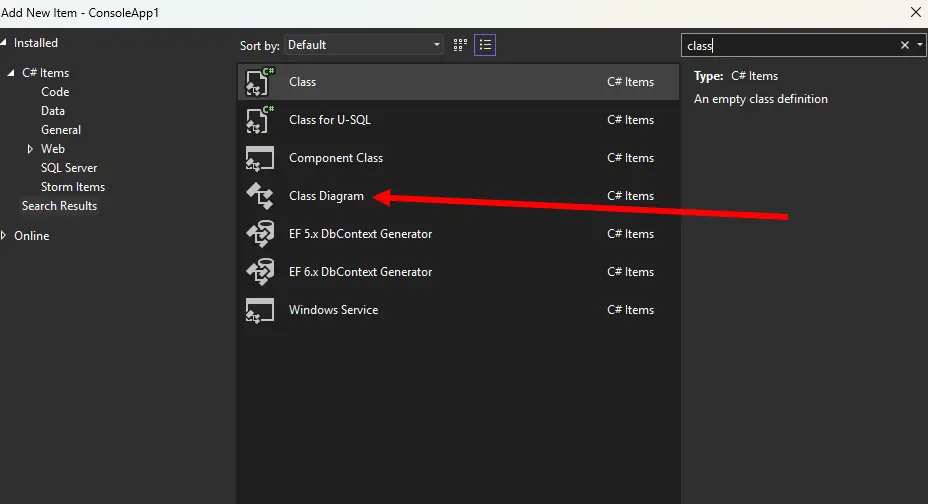
Visual Studio also gives you the ability to design classes and other typees (such as interfaces and delegates) in a visual mannter. The class diagram provides tools that allow you to create,view, and modify the objects in your project and their relationships with other projects. Using this tool, you are able to visually add or remove members to (or from) a type and have your modifications reflected in the corresponding C# file. Visual Studio Installer -> Please Individually Components -> Type "Class Designer" and download.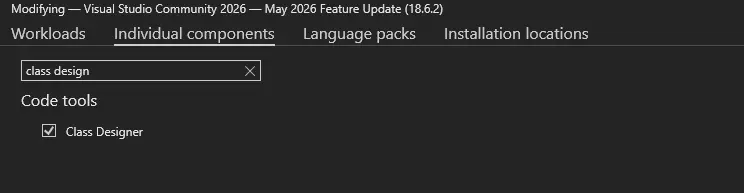 Solution Explorer -> Add -> New Item -> Class Diagram.
 If you have created an example class (ex: Car.cs) then drag the class file from Solution Explorer onto the class Diagram.
The Class Designer Toolbox allows you to insert new types (and create relationships between these types) into your project visually.
If you have created an example class (ex: Car.cs) then drag the class file from Solution Explorer onto the class Diagram.
The Class Designer Toolbox allows you to insert new types (and create relationships between these types) into your project visually.